Pull request previews for Jekyll
Here's a step-by-step guide to help you install PushPreview in your Jekyll project.
Prerequisites
Before you begin, you'll need to have the following:
- A PushPreview account. If you don't have one, sign up for free.
- A Jekyll site created.
1. Add the workflow to your repository
To set up the PushPreview workflow in your Jekyll project:
Go to the
.github/workflowsdirectory in your Jekyll repository.Create a new file named
pushpreview.yml.Copy the following content into
pushpreview.yml:name: PushPreview
on:
pull_request_target:
types:
- labeled
jobs:
preview:
runs-on: ubuntu-latest
if: github.event.label.name == 'preview'
steps:
- uses: actions/checkout@v4
with:
ref: ${{ github.head_ref }}
- name: Comment
run: |
gh pr comment ${{ github.event.pull_request.number }} --repo ${{ github.repository }} --body "⚙️ Hang tight! PushPreview is currently building your preview. We'll share the URL as soon as it's ready."
env:
GH_TOKEN: ${{ secrets.GITHUB_TOKEN }}
- uses: actions/setup-node@v3
with:
node-version: 18
- name: Set BASE_URL
run: echo "BASE_URL=/github/${{ github.repository }}/${{ github.event.number }}/" >> $GITHUB_ENV
- name: Build site
run: |
cd docs
yarn install --frozen-lockfile
yarn build
- name: Generate preview
uses: TechDocsStudio/pushpreview-action@1.0.6
with:
source-directory: ./docs/build
github-token: ${{ secrets.GITHUB_TOKEN }}
pushpreview-token: ${{ secrets.PUSHPREVIEW_TOKEN }}Replace the
actions/setup-node@v3step to install Ruby instead:- name: Setup Ruby
uses: ruby/setup-ruby@v1
with:
ruby-version: '3.0' # Adjust the Ruby version as needed for your projectModify the Build site step to align with your Jekyll build process. For example:
- name: Build site
  run: |
    cd docs
    gem install bundler
    bundle install
    bundle exec jekyll build
Ensure the
source-directoryin the Generate preview step points to your Jekyll build output folder, typically./_site:- name: Generate preview
uses: TechDocsStudio/pushpreview-action@1.0.6
with:
source-directory: ./docs/_site
github-token: ${{ secrets.GITHUB_TOKEN }}
pushpreview-token: ${{ secrets.PUSHPREVIEW_TOKEN }}Save your changes and push the updated
pushpreview.ymlfile to your repository.
2. Configure the GitHub secret
To configure the GitHub secret, follow these steps:
Generate a PushPreview token. For more information, see Authentication.
Go to the Settings tab of your GitHub repository or organization.
In the Settings menu, navigate to Secrets and chose Actions.
Click on New repository secret or New organization secret, depending on your choice in the previous step.
Use the following details to create a new token:
- Name:
PUSHPREVIEW_TOKEN - Token: The token you have generated.
- Name:
Click Add secret.
3. Verify the installation
To ensure proper functioning of the PushPreview integration in your GitHub repository, follow these steps:
Create a new pull request in your GitHub repository.
Add the
previewlabel to your new pull request. If the label doesn’t exist, create a new one.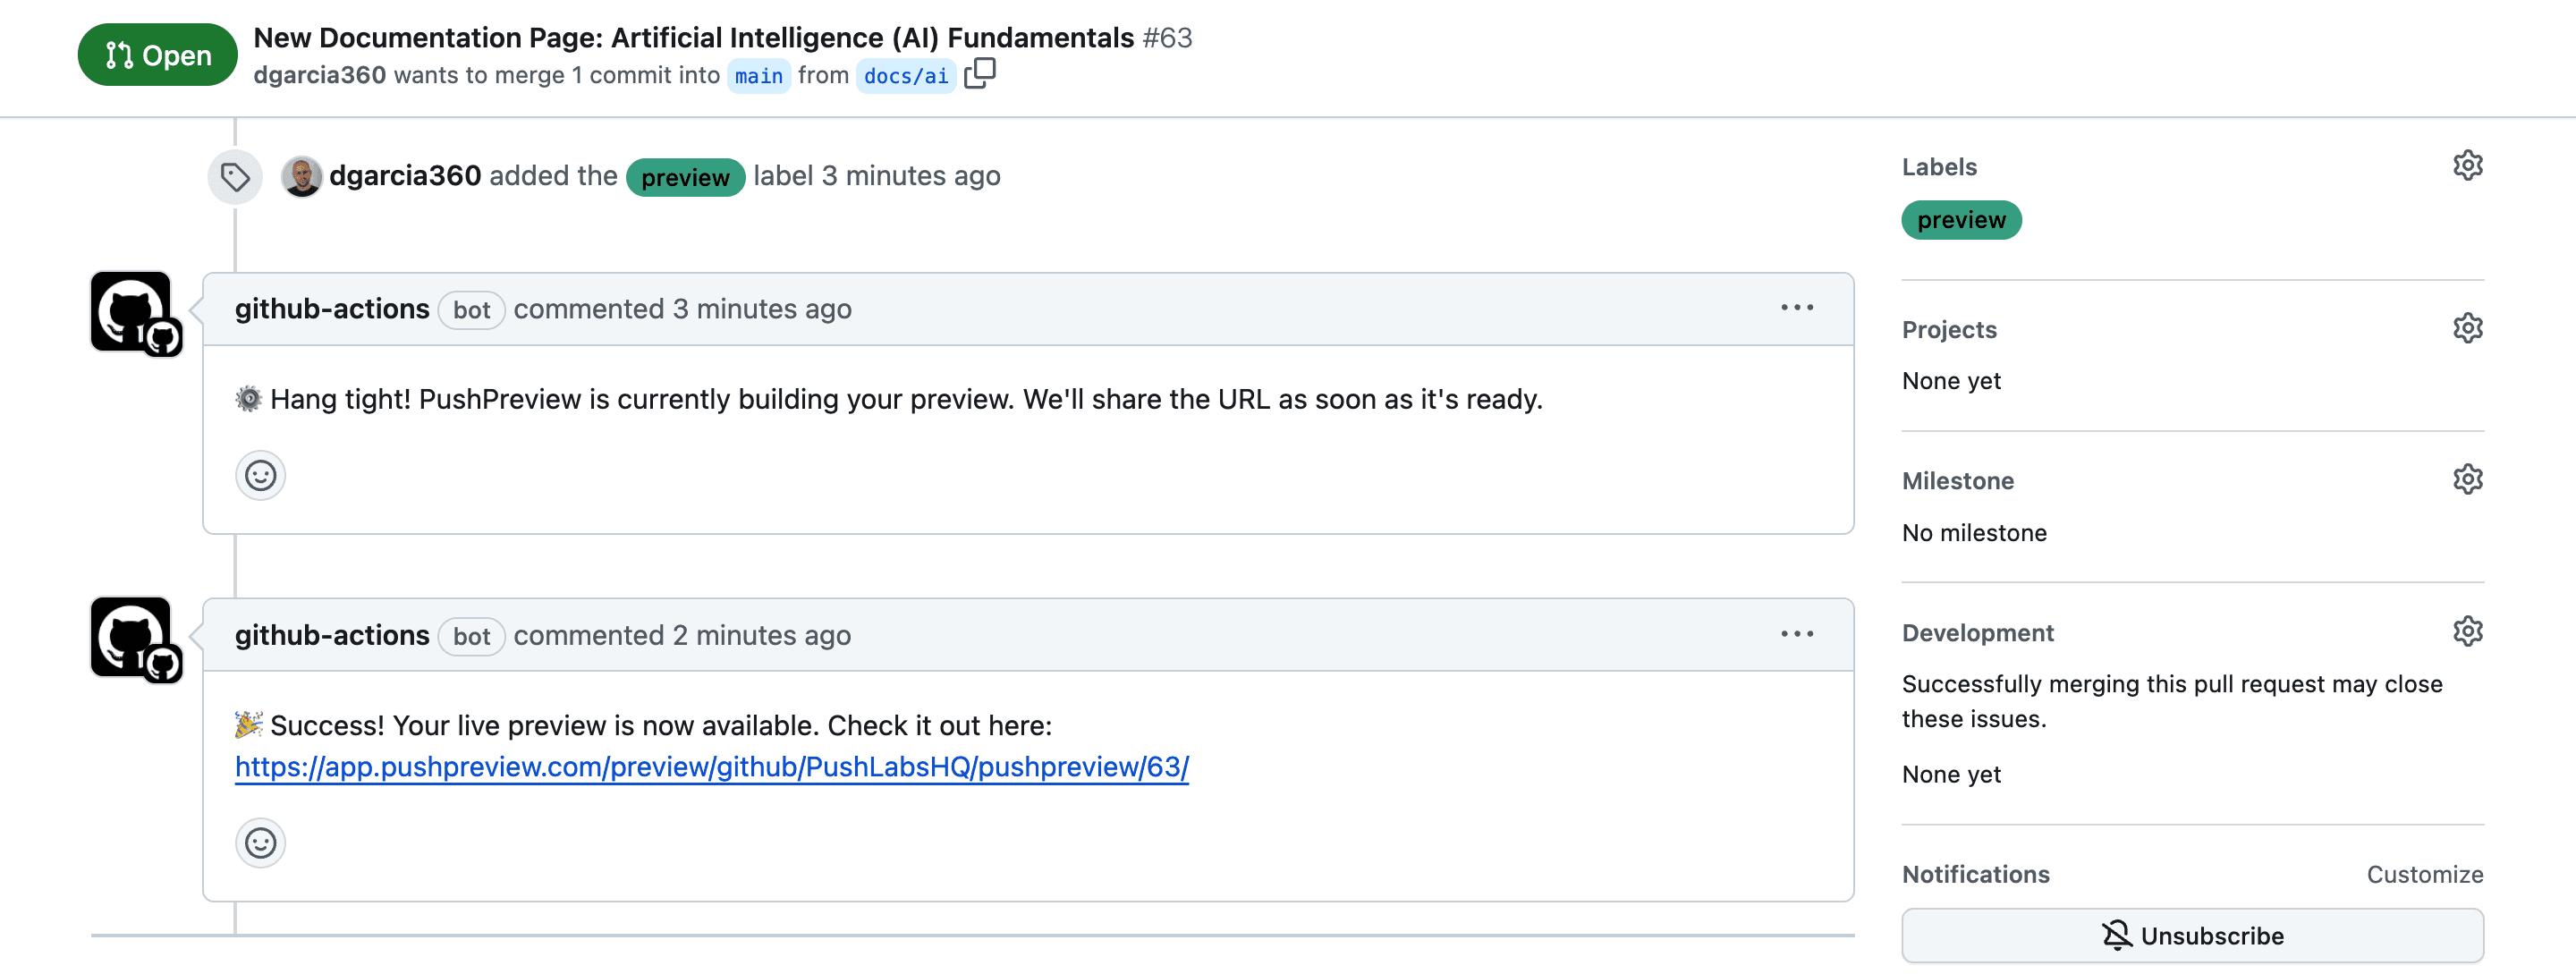
Wait briefly for PushPreview to process the pull request and post a comment in the pull request thread.
Look for a comment from PushPreview containing a preview link. Click this link to view the changes.
Congratulations on setting up PushPreview! Your users can now view live previews of changes in pull requests, enhancing collaboration and review efficiency.